Glenn Arthur

Glenn Arthur

Saturday, December 14, 2013

A Holiday of Uncharted Territory!

Happy Holidays everyone!

The holiday season is upon us yet again and I have to admit that I am sucker for any and all things festive and themed (especially for the holidays!) I almost always try to do something holiday related with my artwork, whether it be a simple sketch, a full painting, or this year (for the first time ever) a hand sculpted and painted holiday ornament!


As most of you know, I love to experiment and try new things with my artwork, so when the opportunity came up to be a part of the Deck The Halls show with Thinkspace Gallery, I jumped at the chance to try something I've never done before! Sculpting!

I'm all about utilizing my resources when it comes to making art, so for this project I enlisted the help of my brilliantly talented friend, Jennie Cotterill. If you're not familiar with her work, do yourself a favor and check it out. She is a master of 2D art, 3D art and all other art in between. She introduced me to and showed me how to use Magic Sculpt to make my ornament. Once I learned the basics, I set off on my own and here is the process I took...

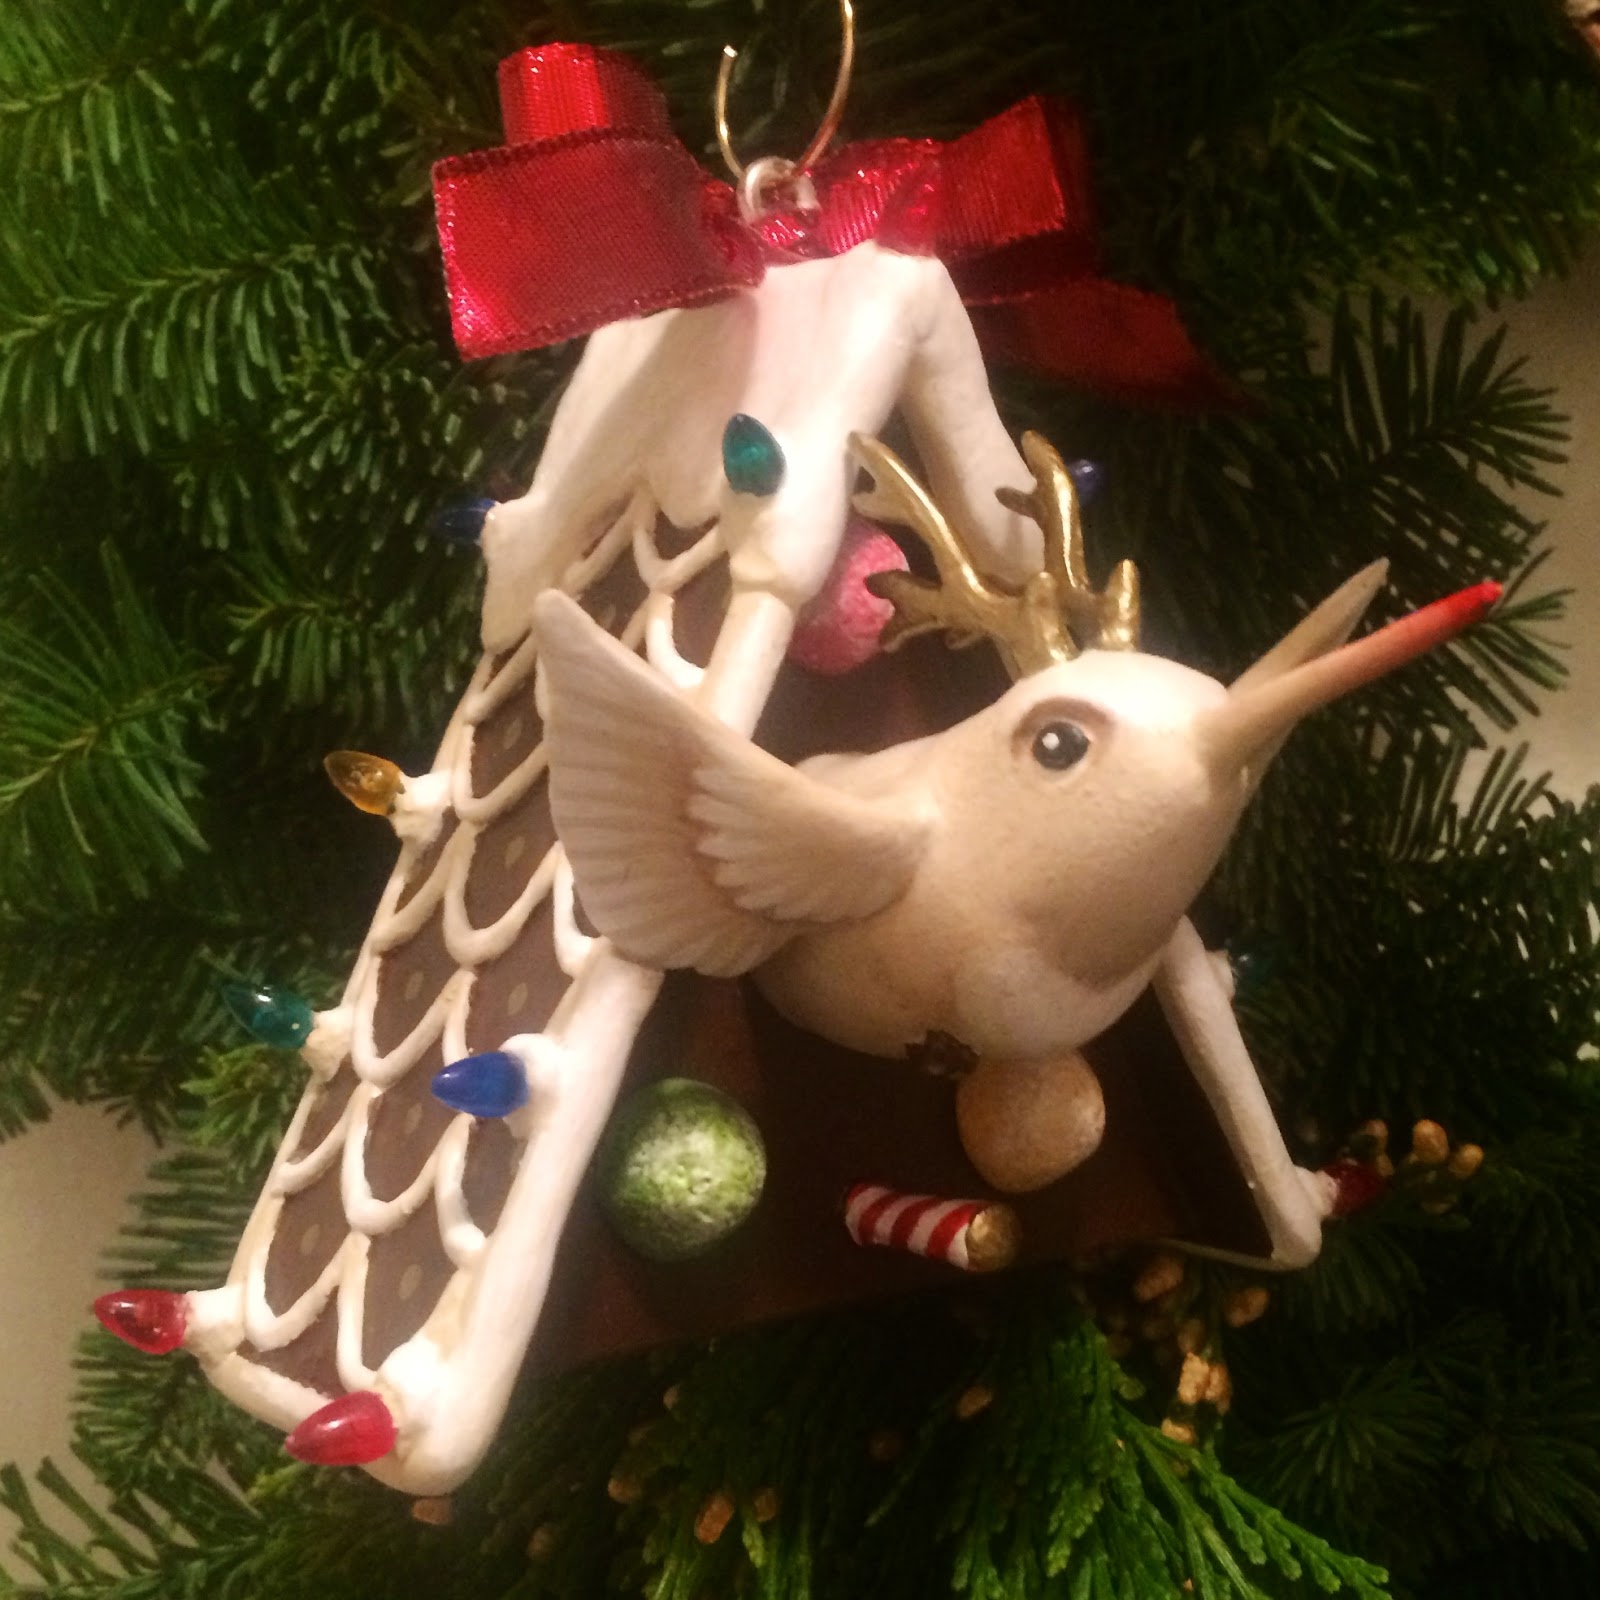
The idea behind my ornament was to have my hummingdeer character flying out of a gingerbread birdhouse. I started by creating an armature (which is basically the skeleton of a sculpture) with craved foam, wire and masking tape. I used light weight materials to cut down on the heaviness of the ornament so it would hang easily without putting too much weight on a christmas tree branch. The frame for the birdhouse is a prefabricated basic wooden craft ornament that I modified and sculpted on top of. I also used a string of mini craft christmas lights and ribbon to finish it off.


Once I had the basic armature done I started layering the Magic Sculpt on top. If you're not familiar with Magic Sculpt, it is basically a putty type of epoxy clay that consists of two equal parts (resin and hardener) mixed together to activate it. Once mixed it has approximately a 3 hour working time from mixing to hardening and can be sanded, drilled or modified with carving tools after hardening. I sculpted in layers, letting the Magic Sculpt fully set between layers so that I wouldn't have to worry about trying to sculpt everything all at once.


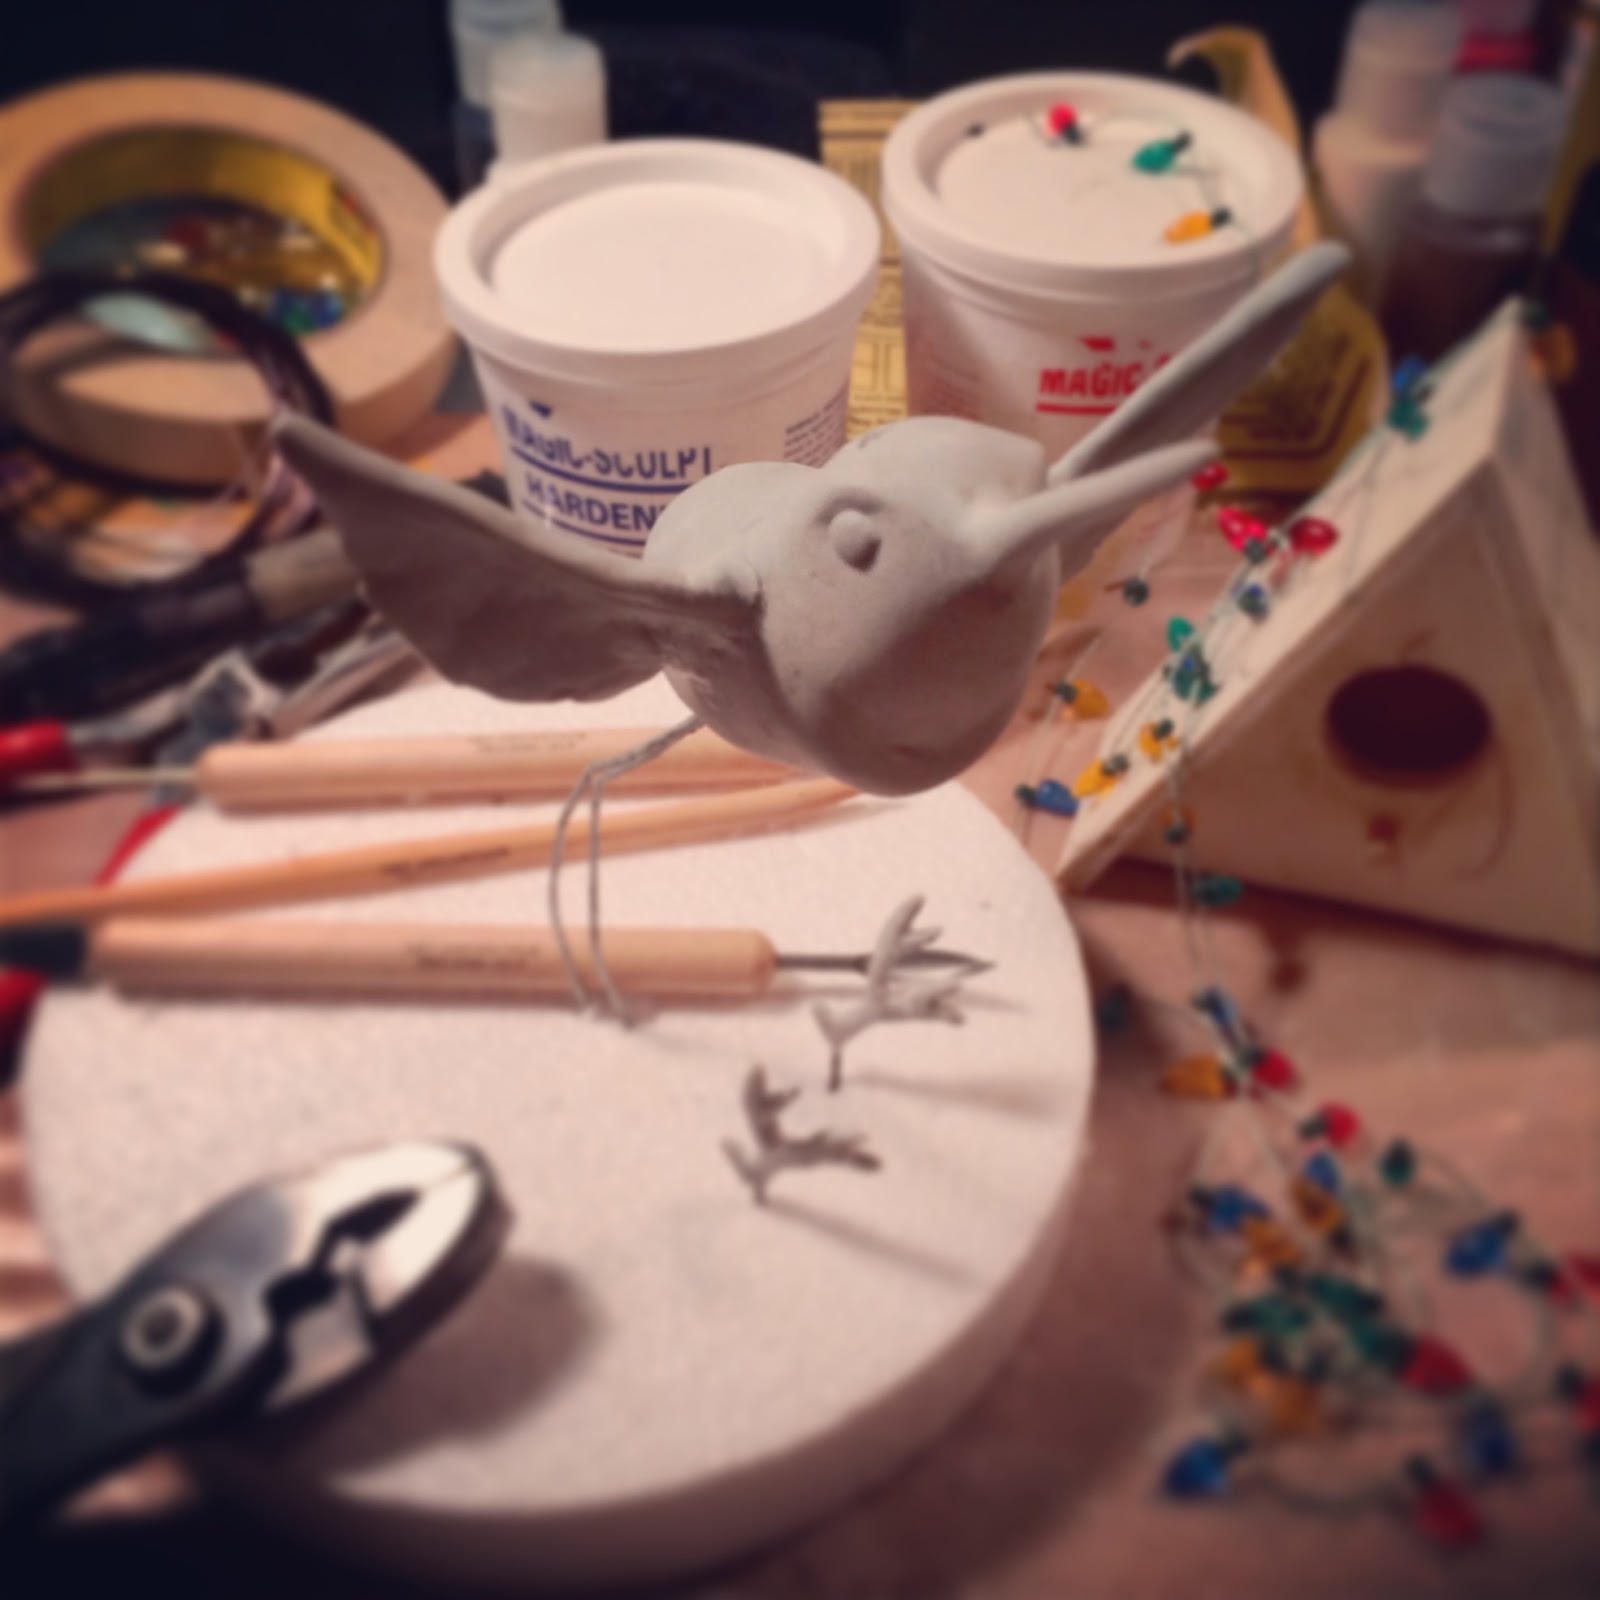
I decided to sculpt and paint the hummingdeer and gingerbread birdhouse separately to make it easier to work on small details and paint areas that would otherwise be hard to reach had they been attached. I made sure to leave grooves in the birdhouse where the hummingdeer's wings would rest so that there would be multiple spots to attach and secure it. After finishing the sculpt, I primed the entire thing with a few thin coats of gesso.


After the gesso was dry I began to paint. Although I'd consider myself a fairly decent painter, I must confess that painting a 3D object is far more difficult for me than creating a 3D looking object on a flat surface.


When both parts were painted and varnished, they were ready to be connected. I used more Magic Sculpt to adhere the base of the hummingdeer to the birdhouse and superglue to secure the wings into the grooves that I had left for that specific reason. I did some minor touch ups with paint and detail work to finish it off and voila! My very first sculpt was complete!


I was definitely way out of my element throughout this entire project and I can't say that I didn't have a few nightmares about it. But, I would have to say that overall I had a blast working on it and I'm very pleased with how it turned out! Will I sculpt again? Absolutely! I'd love to get better and refine my technique. That's what art is all about for me. Exploring uncharted territory and constantly learning new things! HUGE thanks again to my friend Jennie Cotterill for all of your help and encouragement! You're the best!

Happy Holidays everyone! Now go make some holiday art!

Tuesday, November 5, 2013

A Tiger Of A Different Stripe

First and foremost, I know that I have severely neglected this blog, and I sincerely apologize for that. This year has been a whirlwind of amazing changes and growth for me and I couldn't be more excited about it (although my head has felt like it was about to spin right off a few times!) If you are following me on any of my social networks then you've been right along for the ride and I hope you've enjoyed it! However, in all of the craziness, my poor blog was pushed to the back burner, but I'm pulling it up to the front and I will try to get better at keeping it up and sharing more in depth my processes and progresses with you guys because you are awesome and I wouldn't be who or where I am without you!

Lately I've been in experimental mode and trying a lot of new things with my artwork because I feel that is the best way for an artist to learn and improve! One such experiment is this painting I just finished that I'm calling, "A Tiger Of A Different Stripe."


I've always loved the idea of flat, graphic imagery mixed with fully rendered, three dimensional imagery so I wanted to create a piece that compared the two side by side. As always, I started with a sketch. I split it down the middle, shading one side and leaving the other side simple line work. Once I finished the face, I overlaid some tracing paper to design her hair and other elements.


After the general piece was figured out, I transferred the sketch to a surface to begin painting. (Please check out my earlier post about transferring a sketch to see how I do it.) I decided to work on gessobord for this piece instead of a wood panel to achieve a solid flat look without the the natural wood grain that usually flows through my work. I started with the side that I wanted to look more realistic with depth and shading.


I then moved on to the side that would have the graphic feeling to it. Just for some visual fun, I decided to swap some imagery, placing graphic over rendered and vice versa.


I loved the idea of using all things related to tigers for this piece because I felt like it all worked so well with what I was trying to visually create, so I used tiger lilies, tiger's eye beads, a tiger tattoo and of course little tiger striped hummingbirds. And thus, A Tiger Of A Different Stripe was born! The painting is 12"x12" acrylic on gessobord 2013.


Thanks for stopping by and I promise to post more and keep giving you guys a glimpse into my crazy little world. Enjoy! 

Saturday, December 8, 2012

Waste Not, Want Not: Practice Makes Proficient!

Hey guys!

Between getting paintings ready for gallery shows and whatnot, I like to constantly squeeze in sketches and practice different types of art so my skills don't get rusty. When I do this, I usually just use art products that I already have hanging around so they won't go to waste. (I have a ton of Prismacolor products so I tend to use them the most for practicing. They're great quality and really versatile so they're perfect for this sort of thing!) Here is a piece I just finished using Prismacolor brand art markers and Prismacolor Verithin brand colored pencils on 8x10 bristol vellum paper.


I thought it would be fun to share my process on this piece because, like I always say, practice makes proficient! Although I consider this just a practice piece, I'm really happy with the way it turned out and can't wait to apply what I learned working on it to my show paintings.

I started with a base coat of marker. I used a lot of warm tones on this ones, layering from lighter to darker, building up values until I got to the point where I wanted to add in detail with colored pencil.


I went in with colored pencil, using similar colors, to build up more values and soften out the edges left behind by the marker. I also added in a lot more detail to the hair and to her makeup.


Once I felt like she was refined enough, I went back in with marker to add in her collar and some more tattoo design to her chest. I followed the same procedure as before by adding some polishing details with colored pencil on top of the marker.


That's about it. Hope you enjoyed my little practice piece of art and I encourage all of you to go make some practice art too! Have fun and don't forget... Practice Makes Proficient! 

Love you guys!

Glenn

Tuesday, October 16, 2012

Transferring A Sketch

Hey guys...

I've been getting a lot of questions about how I turn my sketches into full paintings. So I decided to make a step by step tutorial on my process. I use a transfer rub method using tracing paper. It can get a little tedious but I prefer it to using a projector because I feel like the transfer is a little more precise. 


STEP 1.

First I make sure that I have all the tools that I need to make a transfer sheet. To transfer this piece I'll be using the original sketch, a lightbox, tracing paper, a soft lead mechanical pencil, a hard lead drawing pencil, a blending stump and the prepped wood panel that I will be transferring the sketch to. 


STEP 2. 

To make the transfer sheet I flip the original sketch (drawing side down) onto the light box, place a sheet of tracing paper over it and begin to trace. I like to use a mechanical pencil with a soft lead for this part for two reasons: a softer lead will transfer easier and a mechanical pencil will keep the line work consistent without having to sharpen it. When making the transfer sheet, I try to keep the lines as simple as possible to make the transfer clean and easy. When I'm done tracing I end up with a reversed, line drawing copy of the original sketch. 


STEP 3.

Once the tracing paper transfer sheet is made, I flip it back over (pencil side down) onto the wood panel. I secure it with masking tape to make sure that it doesn't slip or shift during the transfer. I use a blending stump to rub over the entire drawing to transfer the pencil lines onto the wood panel. When the transfer is finished, the lines left on the wood panel are usually somewhat faint and can wipe off fairly easy so I go over the entire drawing with a hard lead drawing pencil (I use a 4H) to secure the image.


STEP 4.

Now that the transfer is done, I clean up any lines or mistakes and then I'm ready to paint. I like to keep the original sketch nearby to use as a value study so I know where all of the shadows and highlights will be. 


And that's about it. Thanks for stopping by and I hope this answered some of your questions. Keep in mind though, there are many ways to transfer a sketch to another surface to get it ready for paint. This is just the method I prefer. Take care everyone! Until next time!

Glenn


Friday, August 3, 2012

Devoured - Signs of the Apocalypse

I was recently invited to do a show curated by my awesome friend, Lou Pimentel, to take place at the MyPlasticHeart gallery in New York City called Signs of the Apocalypse. Of course, in my mind, anything related to the apocalypse means ZOMBIES! I jumped on the chance to be a part of this show and immediately set to work on a zombie themed painting and here's what I came up with.

Devoured - 11x14 acrylic on wood 2012


I know, I know. Poor little birdie!

Here are a couple of progress shots 


And check out the lineup of phenomenal artist that will also be in the show!


The show opens Friday, August 3rd and runs through Sunday, September 2nd. If you're in the NYC area I highly recommend checking it out!

Thanks for stopping by!

Monday, July 9, 2012

Adorned In Seduction

Hey guys!

Remember doodling tattoos all over girls in magazine ads when you were a kid? Well I'm not sure about you, but I still love to do this! My amazing photographer friend, Amy Kaplan, shares the same love of decorating lovely ladies with tattoos so we've decided to take it to the next level. She brought me a gorgeous photo from a recent shoot she did and asked me to paint on top of it. Naturally the inner magazine doodling child in me loved the idea and this is what we came up with!

Adorned In Seduction - 8x10 acrylic on photograph 2012
Glenn Arthur and Amy Kaplan


Here are some process shots so you can see how I set about painting the tattoos on the actual photograph.

When I received the photo from Amy, I threw a piece of tracing paper on top of it to design the tattoos and map out where I wanted to place them on the model.


After I got that all figured out, I inked the design on the tracing paper to make sure the lines were crisp and clean. Then I broke out my trusty light box, layered the photo over the tracing paper design and began to paint directly on to the photograph.


I used acrylic paint mixed with a small amount of acrylic ink to help the paint glide a little easier over the photograph. Ink alone did not give enough solid coverage and smeared too easy on the photo paper so the paint was a definite necessity! I also had to use a very tiny brush as the photo was only an 8x10 so some of the tattoo designs ended up being super little!


Amy and I are both so excited about the way the final piece turned out! And to make it even better, the piece will be on display at the Rothick Art Haus 3 year anniversary show opening Saturday, July 14th!

Hope to you guys there!

Monday, June 25, 2012

Color Washed!

Hey kids!

It's time for more art! Allow me to introduce Color Washed! This is a new mixed media series that I've been experimenting with. Each image is done with acrylic paint, ink and colored pencil on bristol paper. I plan on adding more and more images to this series with different designs in the near future. In the meantime, here are the first four images. Enjoy! 

Brilliantly Blue
11x17 acrylic, ink & colored pencil on bristol paper 2012


Gorgeously Green
11x17 acrylic, ink & colored pencil on bristol paper 2012


Perilously Purple
11x17 acrylic, ink & colored pencil on bristol paper 2012


Playfully Pink
11x17 acrylic, ink & colored pencil on bristol paper 2012